Hand In Your Work with Git
Hand in an exercise by making a public repository of your own on GitHub, pointing your clone at it with git remote set-url, saving your work with git add and git commit, sending it with git push, and submitting the repository's address.
Novice · Git · Updated
After this lesson you can
- Save your work in a commit with git add and git commit, checking each step with git status
- Send your work to a public repository of your own with git remote set-url origin and git push -u origin main
Key takeaways
- You can't push to the exercise's own repository, so you make a public, empty repository of your own on GitHub and point your clone's origin at it with git remote set-url.
- git add stages your changes, and git commit saves them as one snapshot with a message. git status shows each step.
- git push -u origin main sends your commits to GitHub. The first time, Git Credential Manager signs you in through your browser.
- Submitting your repository's address on the exercise lesson is what completes it. Push again and resubmit after any change.
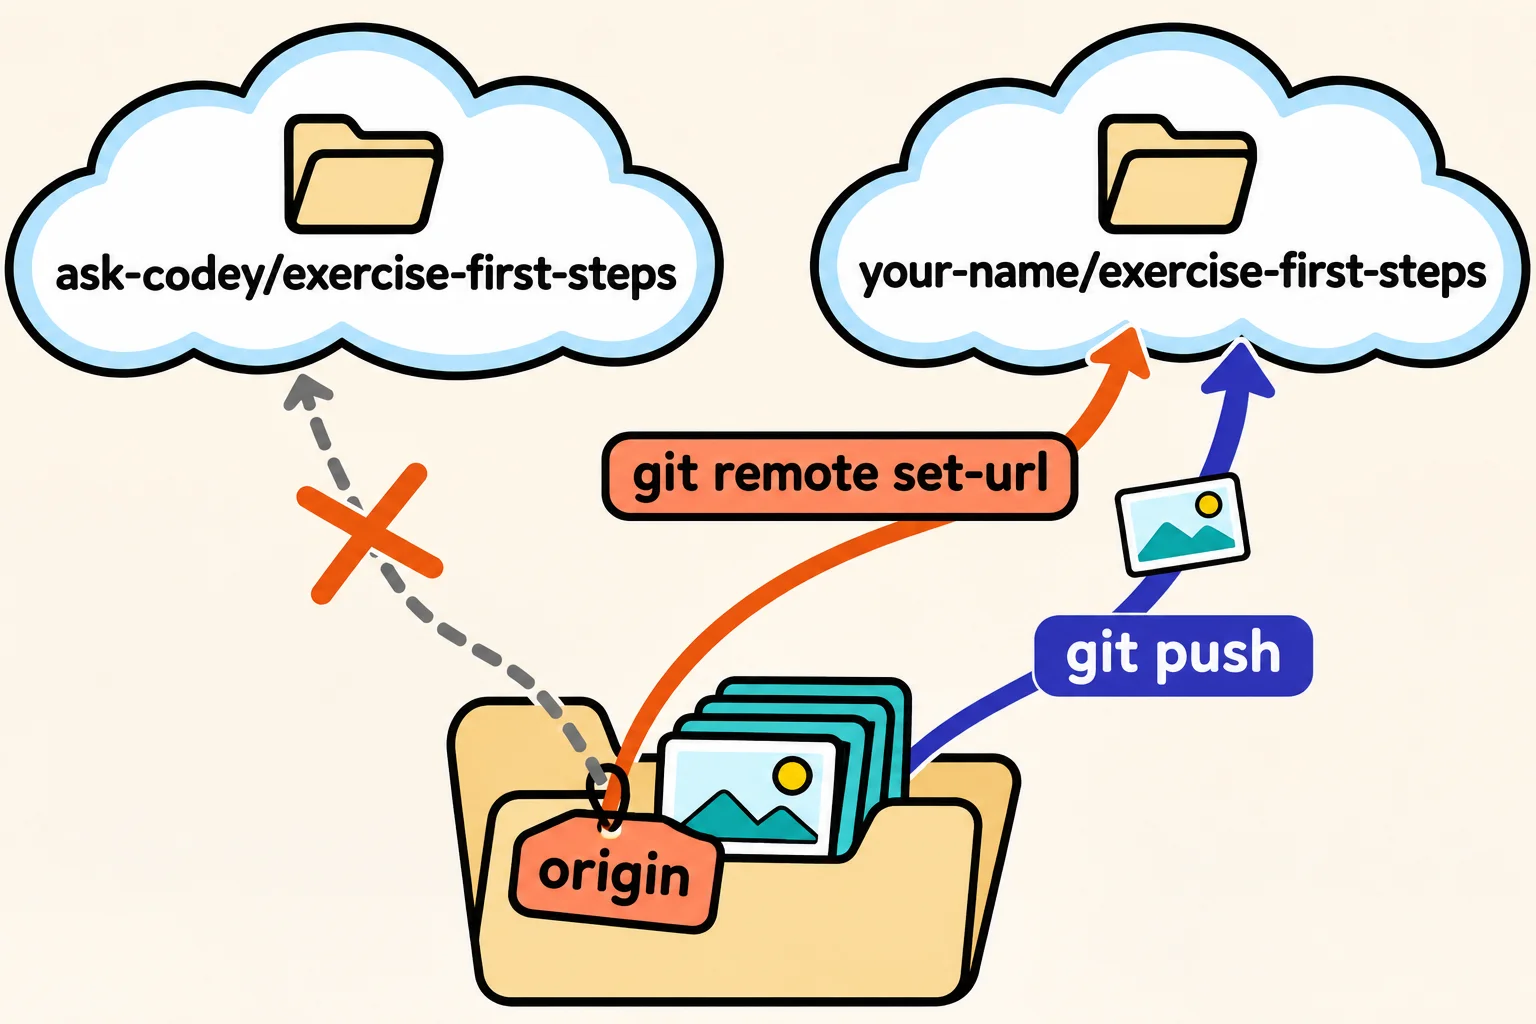
You've finished an exercise, and every test passes, but the work is on your computer, where nobody else can see it. The site checks exercises on GitHub, so the work has to get there, into a repository of your own. And you can't send it back where it came from: the exercise's repository belongs to ask-codey, and Git refuses a push from anyone who doesn't own it. So you make a repository of your own, point your copy at it, and send your work there. It takes five steps, and the same five finish every exercise.
The examples use an exercise named exercise-first-steps, whose work is in first-steps.js; your exercise's names will be its own (in a Python course, a .py file). Run every command in VS Code's terminal, inside the exercise's folder.
Make a public repository of your own
On GitHub, click the + at the top right, then New repository:
- Repository name: the exercise's name, such as
exercise-first-steps. - Public, so the site, and anyone you show, can see it.
- Leave Add README off: your folder already has one, and a new README on GitHub would clash with it.
- Click Create repository.
GitHub shows the new, empty repository's address, such as https://github.com/your-name/exercise-first-steps.git, with your username in place of your-name.
Point your copy at your repository
A clone's origin is the address it came from. Change it to your new repository's address with git remote set-url, then check it with git remote -v:
git remote set-url origin https://github.com/your-name/exercise-first-steps.git
git remote -v
origin	https://github.com/your-name/exercise-first-steps.git (fetch)
origin	https://github.com/your-name/exercise-first-steps.git (push)
Save your work in a commit
Packing a parcel takes two steps: you choose what goes in the box, then you seal it and write the label. Git works the same way. git add chooses what goes in, called staging, and git commit seals it into a commit, a snapshot with a message. git status shows what's in each step. Before you add anything:
git status
On branch main
Your branch is up to date with 'origin/main'.

Changes not staged for commit:
  (use "git add <file>..." to update what will be committed)
  (use "git restore <file>..." to discard changes in working directory)
	modified:   first-steps.js

no changes added to commit (use "git add" and/or "git commit -a")
git add . stages every change in this folder (the ., read "dot", means "this folder"). Run git status again, and the file moves under Changes to be committed. On Windows, git add may also print a warning that LF will be replaced by CRLF: that's about how lines end in a text file, and you can ignore it. Then commit, with a message that says what you did:
git add .
git commit -m "My solution"
[main fbd1aef] My solution
 1 file changed, 1 insertion(+), 1 deletion(-)
Your commit gets its own id in place of fbd1aef. git status now says Your branch is ahead of 'origin/main' by 1 commit: the commit is saved on your computer, and GitHub doesn't have it yet.
Send it with git push
git push -u origin main
git push sends your commits to origin, your repository. -u links your main branch to GitHub's, once, so later pushes need only git push. Git prints a few lines as it sends, ending with branch 'main' set up to track 'origin/main'. Refresh your repository's page on GitHub, and your files are there.
The first time you push, Git Credential Manager opens a window to sign you in to GitHub. Choose Sign in with your browser, then Authorize on the GitHub page that opens. Git remembers you after that.
Submit, and fix what goes wrong
Paste your repository's address, such as https://github.com/your-name/exercise-first-steps, into Submit your exercise on the exercise lesson. The site checks that the repository is public and holds your commits, and the lesson is complete. Changed something later? Commit, git push, and submit again: your latest submission is the one that counts.
| What you see | What to do |
|---|---|
nothing to commit, working tree clean when you expected changes |
Your files aren't saved. Save them in VS Code, then git add . and commit again. |
Author identity unknown |
Git doesn't know your name yet. Run git config --global user.name "Your Name" and git config --global user.email "you@example.com" with your own, then commit again. |
Permission to ask-codey/... denied or 403 |
origin still points at the exercise's repository. Run the git remote set-url line with your own address. |
Username for 'https://github.com':, or Support for password authentication was removed |
Git Credential Manager isn't set up, so Git asked for a password, which GitHub doesn't take. Install it as your course's Git setup lesson shows, then push again. |
! [rejected] main -> main (fetch first) |
Your GitHub repository has a commit you don't, usually a README made with it. Make a new repository with Add README off, point origin at it, and push. |
Check yourself
2 questions to try on the lesson page.
So what
Make a repository, point origin at it, add, commit and push: those five steps hand in every exercise, and they're the same steps a developer at work uses to share code every day.